|
|
www.moyoway.com |
Buy your Certified Organic |
|
|
CLICK FOR NAKED www.moyoway.com |
Moyo is an African origin word which implies that the
"heart and mind act as one to cultivate the spirit”
Natural Advantage Soap Recipes
>Home Page >>Natural Advantage Ingredients >>>Natural Advantage Recipes >>>>Natural Advantage Soap Recipes
Natural Advantage Recipes - S
SOAP - SOLID SOAP
What's Good about our Natural Advantage Recipes?
There are literally thousands of home made soap recipes around the internet. I have collected some of my favourites and added them to this natural advantage soap recipes page.
In a rush?
My favourite oils are jojoba and coconut – jojoba because of its moisturising properties and coconut because of its benefits in soap making – my natural advantage.
Coconut oil tends to keep the soap hard which is useful in warm climates. It also makes the soap lather well in hard water. Living in countries where our water is almost always directly from the ground, it is often hard. A well lathering soap bar also creates the perception that it is more “real” than a soap bar that does not lather as well.
Click to enlarge
Why Should You be Interested in Natural Advantage Soap Recipes?
Not only do you know the ingredients in your soaps but the message that you send out to the big cosmetic companies is that you no longer support them.
Many DIY'ers, like myself, are tired of being ripped off, tired of the chemicals that have unknown long term effects and tired of the poor labelling.
All too often we read about increasing awareness of toxins in cosmetics. Cancer is increasing, pollution is increasing and the cost of cosmetic products offer little value in return.
Many of us no longer wish to be the guinea pigs of big pharmaceutical and cosmetic companies. We no longer wish to have additives such as preservatives, dyes, artificial sweeteners and harmful chemicals in our cosmetics.
Recipes for Natural Advantage Soaps
Recipes are just that … recipes. Follow them and generally your final product will work out. It's the tips and techniques that often finishes off the product just a little smarter.
Be patient, tips and techniques take time to develop if they are not taught to you. We will share what we can, but being a little frustrated when things don't work out perfectly is normal – we have all been there, so keep at it and ask.
Tips and techniques for Natural Advantage Soap Recipes
Some soap mixtures contain solid particles, such as grated herbs. In a very soft mixture, these solid particles will drop to the bottom of the soap mixture. To minimise this problem, always add the solid particles when the mixture starts to stiffen.
This takes a little practice – too soon and they sink, too late and they don't mix uniformly. A rule of thumb is to watch for a layer of skin to develop while still in the heating pot or “feel” the consistency while stirring. Gentle stirring aids cooling by exposing more of the liquid surface to air.
Also remember that when your pot is on the heat, gentle stirring is important – it minimises air bubbles. For no bubbles, don't stir at all.
Many DIY'ers place their moulds in the freezer to speed up setting. You don't have to do this but this technique does help to tighten the skin that is formed around the mixture.
This skin tightening will later help the soap to drop out of the mould but it also helps to create a finishing layer around the bar. This is not a rule as it does depend on the ingredients, but keep this mind and experiment with the technique when possible.
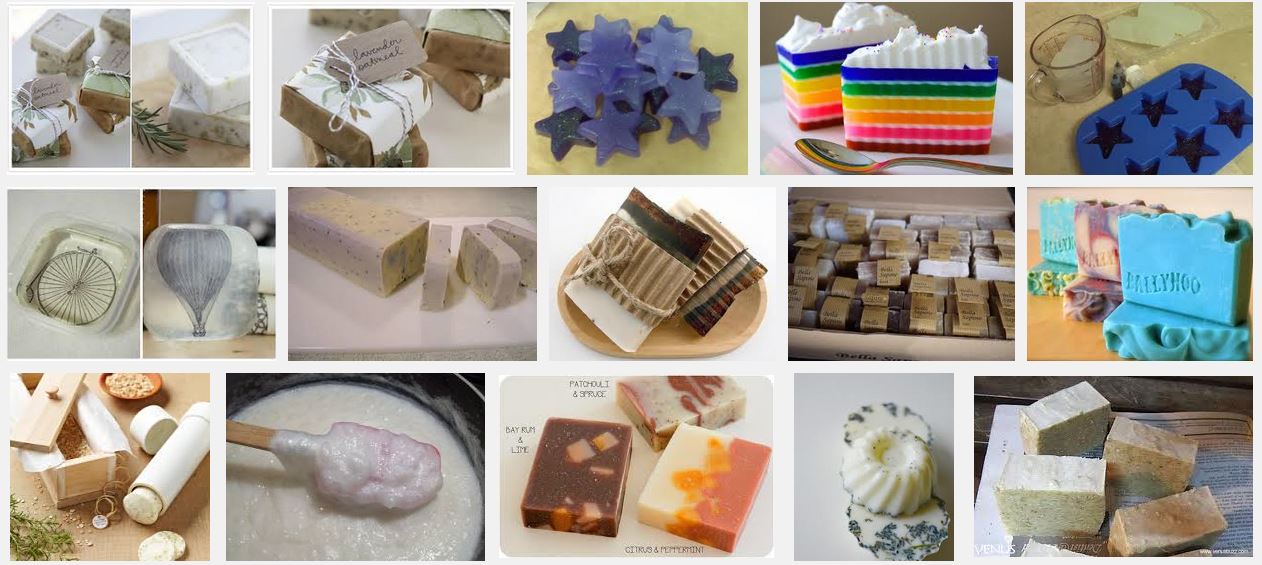
Moulds are an important aspect of soap decoration. Some examples are citrus flavours work well with citrus shaped moulds, oval shapes work well with purply lavender types and basic soaps work well in traditional soap bar shapes.
The list is as long as your imagination. You can use ice cube trays, cookie cutters and even simple hand rolled balls. If you can shape it, you can soap it, so experiment.
All DIY cosmetic recipes are fun to make, especially if you are new to it. Even though all the ingredients are natural, some are very potent, especially essential oils. Always inform yourself when using potent natural ingredients.
Tweak existing recipes until you get blends that work for you. Making natural soap recipes will not create toxins for you or the environment.
Be careful of the lies
Unfortunately, even in this business of cosmetic DIY, there is pain, suffering, damage, corruption and little disregard for our planet and everything on it.
Some oils, like palm oil, are produced with devastating consequences. Do not support these Governments and companies that are killing our planet, by buying their ingredients.
If you are interested, click here to inform yourself more about this problem.
Whenever possible, buy certified organic ingredients. Even this system is not perfect, but it's the best the world has thus far in trying to eradicate world destruction. (Yes, the problem is that big and indiscriminate buying fuels this destruction)
You can click here to help you understand more about certified organic ingredients.
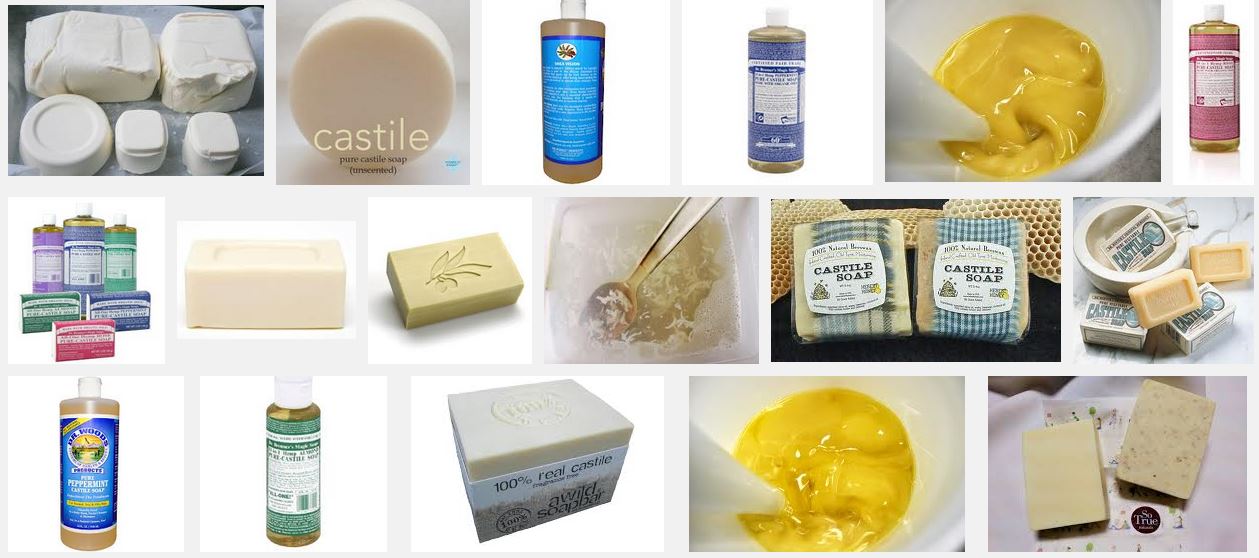
Castile soap
Click to enlarge
Castile soap has an interesting history. Click here if you wish to read a little about it.
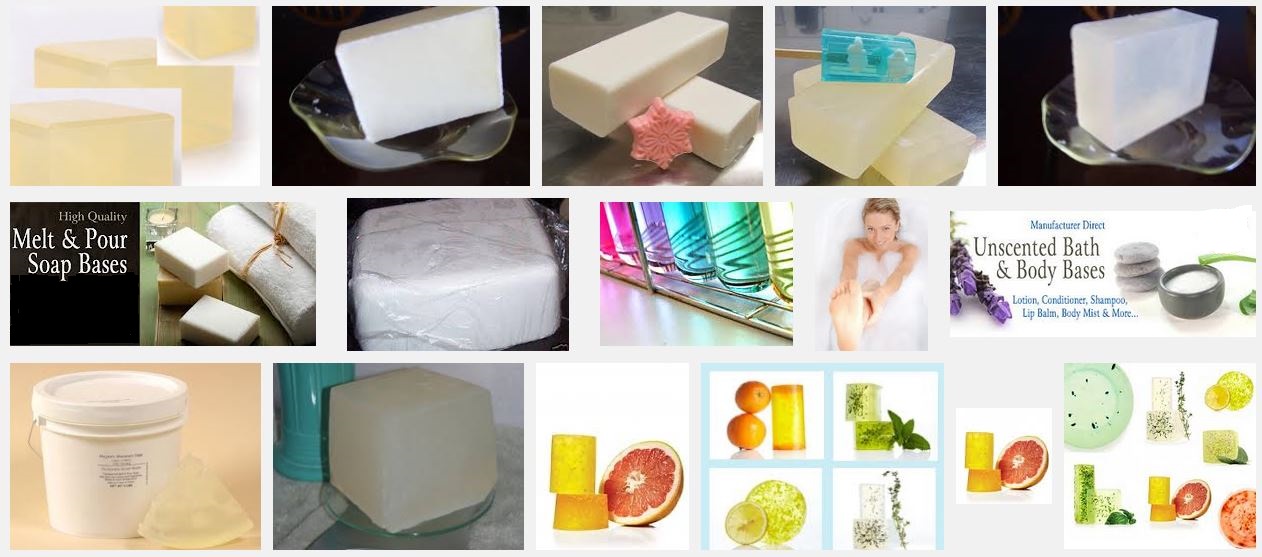
Glycerine Soap
Click to enlarge
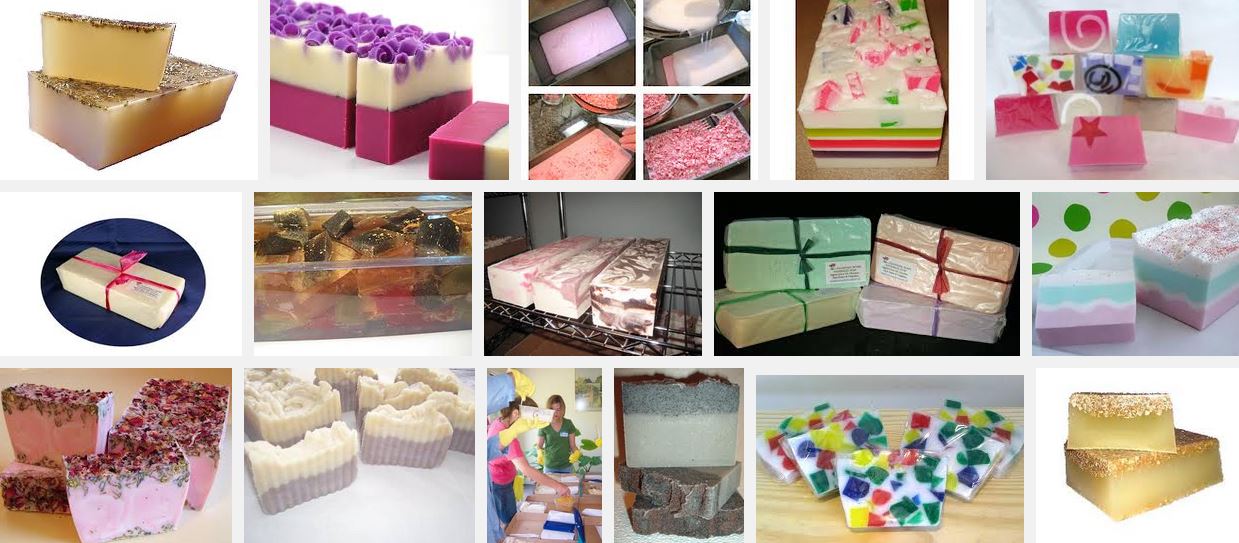
Pans and moulds
Click to enlarge
Taking care of your utensils and containers
Always go to the extra effort to make sure that all your mixing utensils and containers are VERY clean - sterilised if possible.
Dirty utensils and containers are perfect environments for bacteria. In uncontrolled environments, bacteria will make you sick.
Taking care of yourself
Never apply anything to skin that has just been shaved.
If these formulations burn the skin, then dilute them with more water.
Do a patch test. After you have made the product, add some to a cotton-wool ball. Place the cotton-wool ball onto your inner elbow for a few minutes. If there is an irritation, you are either allergic to one of the ingredients or it may be too concentrated.
If there is an allergic reaction, you will need to identify and eliminate the ingredient - once again, you can use the patch test one ingredient at a time.
If the concentration is too high, then dilute with more distilled water.
Remember that distilled water only has all minerals removed. It is not necessarily safe to drink - most often, the water is not sterilised.
Taking care of your new products
Soaps generally last from several weeks to several months depending on factors such as water. There are no preservatives in any of the recipes. Once water is added, the product becomes a breeding ground for bacteria.
As a rule of thumb, recipes with no water will generally last for a few months in an unused condition.
Use your common sense and look out for basic tell tale signs that indicate spoilage, such as :
- smell
- changing colour
- developing fungal growth
- change in texture (for example, smooth to lumpy)
Here are some simple natural advantage soap recipes that are easy to make, easy to use and provide effective performance without having to add synthetically made chemical ingredients.
Start here
There are quite a few recipes on this page which seems a little overwhelming. So we have put them into groups with the main categories listed just below.
Browse through the categories and select the group that interests you. Your click will then automatically take you to the correct recipe location.
The are several “Back to Categories” links scattered throughout the page – click anyone of them to come back here.
(Unlinked categories are not yet completed - they will be up in a few days)
Categories - Natural Advantage Soap Recipes - All
General scented soaps
Recipe 1 - Apple and Cinnamon
Ingredients :
- 115 g. clear and unscented glycerine soap base
- 1 tbsp. liquid soap
- 1 tsp. liquid glycerine
- ½ tsp. apple fragrance oil
- 2 drops red food colouring
- ½ tsp. ground cinnamon
Melt soap in small pan over low heat or in a glass cup in the microwave. Add Liquid Soap and glycerine and stir gently but well.
Add fragrance, colour and cinnamon. Stir and let stand for a couple of minutes – wait a little until the liquid starts to thicken so when you stir again, the cinnamon will distribute evenly.
Pour into moulds and allow to set completely (in or out of freezer).
Wrap in plastic wrap or use cellophane.
Click here for measurement conversion tables
Recipe 2 - Balsam Fir and Basil
Ingredients :
- 1,500 g. opaque and unscented glycerine soap base
- 2 tsp. beeswax pellets
- 2 tsp. cocoa butter
- 1 tsp. vitamin E oil
- 1 to 1 ½ drops of canadian balsam fir essential oil
- Sprinkling of dried and ground basil leaves
- Optional colouring such as light brown or dark green
Melt soap base and cocoa butter in a double boiler (do not let base get any hotter than 160 F / 70 C).
When base is completely melted, add melted beeswax (melted separately), vitamin E and colouring.
After gentle stir, remove the mixed base and allow to cool.
Watch the surface for skin formation. When the skin starts to form, add the essential oil.
Gently stir and allow to cool further. After a few minutes, gently stir in basil.
Pour the mixed base into your mould.
For the most uniform suspension of solid particles (in this case, the basil), the cooler the base should be before adding. This is applicable for all mixed soap bases.
Click here for measurement conversion tables
Recipe 3 - Chocolate
Ingredients :
- 350 g. clear and unscented glycerine soap base
- 150 ml. water
- 60 ml. instant cocoa powder
- 3 to 4 ml. chocolate fragrance oil (use a measured dropper)
In a heavy saucepan, melt the glycerine soap and water over low heat until liquefied.
When the soap has melted, add the cocoa powder and chocolate fragrance.
Mix well.
Pour the soap into a mould and let set for 3 hours or until hardened.
Click here for measurement conversion tables
Recipe 4 - Cinnamon
Ingredients :
- 115 g. clear and unscented glycerine soap base
- 10 drops cinnamon oil
- Optional 1 drop red food colouring
In a heavy saucepan, melt the glycerine soap over low heat until liquefied.
When the soap has melted, add the cinnamon oil and food colouring.
Mix well.
Pour the soap into a mould and let set for 3 hours or until hardened.
Click here for measurement conversion tables
Recipe 5 - Citrus and Calendula
Ingredients :
- 450 g. clear and unscented glycerine soap base
- 60 to 70 ml. dried calendula petals
- 15 drops yellow food colouring
- ¾ tsp. grapefruit essential oil
- ½ tsp. tangerine essential oil
- 1 tbs. melted shea butter... melted separately
In a heavy saucepan, melt the glycerine soap over low heat until liquefied.
Melt the shea butter in a cup placed in a pot of near boiling water.
Add a few drops of the yellow food colouring, the essential oils and then the melted shea butter to the glycerine base.
For the best mixing results, try to have the soap base and the shea butter at the same temperature.
Remove from the heat and gently stir while the mixture cools.
Add the calendula when the mixture starts to stiffen – a slightly stiffer mixture helps to evenly suspend the solid particles.
Start to spoon the mixture into your moulds and let set for 3 hours or until hardened.
Click here for measurement conversion tables
Recipe 6 - Citrus and Lavender
Ingredients :
- 450 g. clear and unscented glycerine soap base
- 120 ml. water
- 1 to 1 ½ tsp. vitamin E oil
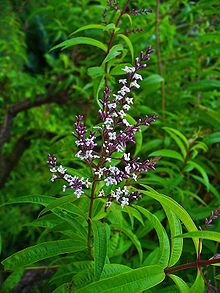
- 1 tbs. ground dried lemon verberna leaves (also known as lemon beebrush)
- 1 tbs. dried lavender buds
- 10 drops lavender oil
- 20 drops sweet orange oil
Melt soap base and water in a double boiler (do not let base get any hotter than 160 F / 70 C).
When base is completely melted, add vitamin E oil, lavender oil and orange oil.
Add the lavender and verberna when the mixture starts to stiffen – a slightly stiffer mixture helps to evenly suspend the solid particles.
Start to spoon the mixture into your moulds and let set for 3 hours or until hardened.
You can experiment by changing the soap texture (of the final product) by omitting the lavender buds and changing the scent strength by adding more or less lavender oil.
Click here for measurement conversion tables
Recipe 7 - Citrus
Ingredients :
- 230 g. clear and unscented glycerine soap base
- ½ tbs. coconut essential oil
- 3 drops lemon essential oil
- 3 drops grapefruit essential oil
- 3 drops orange essential oil
- orange and yellow colourant
In a heavy saucepan, melt the glycerine soap and coconut oil over low heat until liquefied.
Add the essential oils and stir very well (gently, as always)
Pour the mixture into your moulds and let set for 3 hours or until hardened.
Experiment with your moulds, flavouring and colouring.
Click here for measurement conversion tables
Recipe 8 - Coffee
Ingredients :
- 120 g. clear and unscented glycerine soap base
- 1 teaspoon ground espresso
- 10 drops coffee fragrance oil
In a heavy saucepan, melt the glycerine soap over low heat until liquefied.
Add the ground espresso coffee oil and stir very well (gently, as always)
Pour the mixture into your moulds and let set for 3 hours or until hardened.
Click here for measurement conversion tables
Recipe 9 - Cucumber
Ingredients :
- 85 g. opaque and unscented glycerine soap base
- 120 ml water
- 2 tsp. powdered luffa (commonly known as loofah)
- 15 drops cucumber fragrance oil
- 1 tbs. aloe vera gel
- green colouring
Shred the soap in a food processor and set aside.
Boil the water over low heat and stir in the shredded soap.
Continue stirring until the mixture becomes sticky – 4 to 5 minutes.
Remove from heat and stir in the aloe vera gel, the fragrance oil and the green colouring until well blended.
Add the luffa when the mixture starts to stiffen further – a slightly stiffer mixture helps to evenly suspend the solid particles.
Spoon the mixture into a mould and let set for 4 to 6 hours or until hardened.
Click here for measurement conversion tables
Recipe 10 - Honey
Ingredients :
- 115 g. opaque and unscented glycerine soap base
- 1 tbs. beeswax pellets
- 1 tbs. Honey
In a heavy saucepan, melt the glycerine soap over low heat until liquefied.
Melt the beeswax pellets in a cup placed in a pot of near boiling water.
For the best mixing results, try to have the soap base and the beeswax at the same temperature.
Remove from the heat and gently stir in the honey.
Pour into your moulds and let set for 3 hours or until hardened.
Optional - When hard but still malleable and if you are using a flat squarish mould, press your grater into the top side of the soap bar. The textured finish is synonymous with a honey comb.
Click here for measurement conversion tables
Recipe 11 - Jojoba
Ingredients :
- 450 g. opaque and unscented glycerine soap base
- 1 tbs. jojoba oil
- 1 tsp. beeswax pellets
Using a heavy saucepan, melt all the ingredients over low heat until liquefied.
Pour into your moulds and let set for 3 hours or until hardened.
Click here for measurement conversion tables
Natural Advantage Soap Recipes - Back to CATEGORIES
Basic Soaps
Recipe 1 - Glycerine
Ingredients :
- 115 g. clear and unscented glycerine soap base
- 20 drops of your favourite fragrance or essential oil
- 1 - 3 drops of your favourite food colouring
Melt soap base in a double boiler (do not let base get any hotter than 160 F / 70 C).
When base is completely melted, add your oil and colouring.
After gentle and thorough stir, remove the mixed base and allow to cool.
Pour into your moulds and let set for 3 hours or until hardened.
Click here for measurement conversion tables
Recipe 2 - Herbal
Ingredients :
- 230 g. clear and unscented glycerine soap base
- 50 to 60 gr. of fresh herbs
- 50 to 60 gr. of dried herbs
- 3 to 5 drops of an essential oil related to your herbs
In a heavy saucepan, melt the glycerine soap over low heat until liquefied.
Add the essential oils and stir very well (gently, as always)
Remove from heat and while gently stirring (and cooling), add your herbs.
The simplest mould is a flat baking tray poured 3 to 5 cm. Thick and cut later into any shape you like.
Click here for measurement conversion tables
Natural Advantage Soap Recipes - Back to CATEGORIES
Antiseptic and speciality soaps
Recipe 1 - Camphor and Clary Sage (For Poison Ivy)
Ingredients :
- 450 gr. clear and unscented glycerine soap base
- 2 tbs. camphor essential oil
- 1 tsp. clary sage essential oil
In a heavy saucepan, melt the glycerine soap over low heat until liquefied.
Add the essential oils and stir very well (gently, as always)
After gentle and thorough stir, remove the mixed base from heat.
Pour into your moulds and let set for 3 hours or until hardened.
Click here for measurement conversion tables
Recipe 2 – Citronella (Insect Repellent)
Ingredients :
- 240 ml. grated castile soap
- 120 ml. water
- 10 drops citronella essential oil
- 5 drops eucalyptus essential oil
|
 |
In a heavy saucepan, melt the castile soap and water over low heat until liquefied.
Start mixing with a mixer and add all the remaining ingredients.
Whip the soap until it has doubled in volume and spoon the soap into your mould/s, pushing it into the mould/s as best you can. Because of rapid cooling during the whipping process, the mixture hardens as fast, so work quickly.
If the mixture has cooled off and thickened so much that you can no longer push it into the mould/s, then hand mould the soap into large balls.
Click here for measurement conversion tables
Recipe 3 – Cold Cream (Skin Calming)
Ingredients :
- 115 gr. clear and unscented glycerine soap base
- 2 tsp. cold cream
- 10 drops of your favourite fragrance or essential oil
- Optional 1 drop food colouring
In a heavy saucepan, melt the glycerine soap over low heat until liquefied.
Add the cold cream and stir very well.
Remove from heat.
Add the essential oil and optional colouring and stir again very well (gently, as always)
Pour into your moulds and let set for 3 hours or until hardened.
Click here for measurement conversion tables
Recipe 4 - Frankincense (Aromatherapy)
Ingredients :
- 480 ml. clear and unscented glycerine soap base
- 30 ml. powdered frankincense mixed with 30 ml. liquid glycerine
- 1 to 1 ½ tsp. ylang-ylang or frankincense essential oil
In a heavy saucepan, melt the glycerine soap over low heat until liquefied.
When the soap has melted, add the frankincense and glycerine mixture.
Mix well.
Pour the soap into a mould and let set for 3 hours or until hardened.
Click here for measurement conversion tables
Recipe 5 - Mechanics (Grease)
Ingredients :
- 250 ml. borax powder
- 1 to 2 tsp. pure turpentine
- 1 tsp. sweet orange essential oil
- 1 cup opaque melt & pour soap base
Grind the soap with a blender or grinder.
Separately, combine the turpentine (note that this is a petrochemical based product and is toxic) and essential oil into the borax until there are no lumps.
Once the 2 mixes are ready, add the turpentine mix to the soap mix and blend well.
Keep handy in a jar.
Click here for measurement conversion tables
Recipe 6 – Tea Tree (Antiseptic)
Ingredients :
- 500 ml. opaque glycerine soap base
- 2 tbs. tea tree essential oil (works against bacteria, fungi, yeasts and skin viruses)
In a heavy saucepan, melt the soap over low heat until liquefied.
Remove from heat and add the essential oil.
Stir very well (gently, as always)
Allow to cool slightly.
Pour (or spoon) the mixture into your moulds and let set for 3 hours or until hardened.
Click here for measurement conversion tables
Natural Advantage Soap Recipes - Back to CATEGORIES
Special occasion soaps
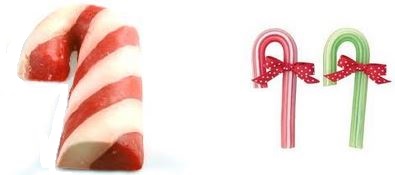
Recipe 1 – Candy Cane Stripes
Ingredients :
- 230 g. opaque melt & pour soap base
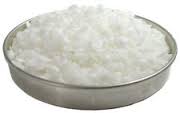
- 1 tsp. stearic acid (this creates a pearly effect)
- Red food colourant
- 1 tsp. candy fragrance oil
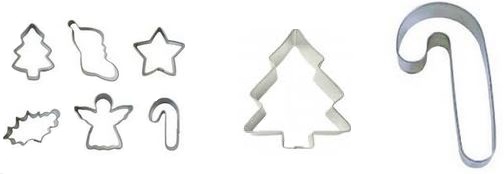
- Candy cane cutter
- Wax paper lined tray
In a heavy saucepan, melt the soap over low heat until liquefied.
Melt the stearic acid granules separately and combine with the soap when both are melted.
Stir very well (gently, as always)
Allow to cool slightly and add the fragrance oil and blend well.
Pour the mixture into the wax paper lined tray – the amount will determine the thickness of the soap cane.
The next step is to create the stripes. Dip a toothpick into the red colourant and swirl into the soap. The swirl will determine the stripes of the cane.
Allow to cool and harden. Once hardened, press the cane cutter into the soap to create your candy cane soaps.
Click here for measurement conversion tables
Recipe 2 - Christmas
Ingredients :
- 170g. opaque glycerine soap base
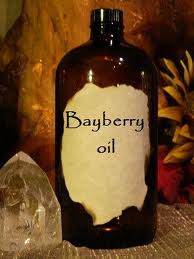
- ¼ tsp. bayberry fragrance oil (blend of fir and balsam with delicate nutmeg and ginger)
- ¼ tsp. peppermint fragrance oil
- Red and green food colouring
- Ultra fine multicoloured or silver glitter
- Christmas tree cutter
- Wax paper lined tray
In a heavy saucepan, melt ½ of the soap over low heat until liquefied.
Remove from heat and add the bayberry and red food colouring.
Repeat for the other ½ of the soap and add the peppermint and green food colouring.
Pour the mixture into the wax paper lined tray – the amount will determine the thickness of the soap cane.
Allow to cool and harden. Once hardened, press the tree cutter into the soap to create your christmas soaps.
Sprinkle with glitter to finish off.
Click here for measurement conversion tables
Recipe 3 – Custom Scent
Ingredients :
- 450g. opaque glycerine soap base
- 5 to 10 ml. of your favourite essential or fragrance oil
- 240 ml. water
- ½ cup of your favourite powdered herbs or rose petals, etc
Melt glycerine in a double boiler with the water.
Allow to cool a little and add the oil and herbs.
Stir very well (gently, as always)
Pour (or spoon) the mixture into your moulds and let set for 3 hours or until hardened.
Click here for measurement conversion tables
Natural Advantage Soap Recipes - Back to CATEGORIES
Soap for men
Recipe 1 – Cinnamon and Orange
Ingredients :
- 500 ml. opaque glycerine soap base
- 10 drops orange essential oil
- 5 drops cinnamon fragrance oil
- 2 drops orange food colouring
In a heavy saucepan, melt the soap over low heat until liquefied.
Remove from heat and add the 2 oils and food colouring.
Stir very well (gently, as always)
Allow to cool slightly.
Pour (or spoon) the mixture into your moulds and let set for 3 hours or until hardened.
Click here for measurement conversion tables
Recipe 2 - Rosemary
Ingredients :
- 450g. opaque glycerine soap base
- 240 ml. full fat milk
- ½ tsp. rosemary essential oil
In a heavy saucepan, melt the soap over low heat until liquefied.
Remove from heat and add the milk.
Stir very well (gently, as always)
Allow to cool slightly and add the essential oil.
Pour (or spoon) the mixture into your moulds and let set for 3 hours or until hardened.
Click here for measurement conversion tables
Natural Advantage Soap Recipes - Back to CATEGORIES
Moisturising soaps
Recipe 1 – Facial
Ingredients :
- 365 g. opaque melt and pour soap base
- 3 tsp. jojoba essential oil
- 1 tsp. lavender essential oil
- 1 tsp. vitamin E oil
- 1 tsp. honey
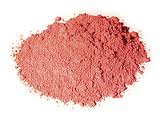
- ½ tsp. pink clay (French Pink Clay is a combination of red and white clays and is considered to be the mildest of all the clays and works well for normal, sensitive and mature skin types. It is normally made of Kaolinite, Iron, Illite, Montmorillonite and Calcite)
- ½ tsp. finely ground lavender flowers
In a heavy saucepan, melt the soap over low heat until liquefied.
Remove from heat and add the vitamin E oil and honey until mixed.
Stir very well (gently, as always)
Allow to cool slightly. Add essential oils, ground flowers and the pink clay.
Pour (or spoon) the mixture into your moulds and let set for 3 hours or until hardened.
Click here for measurement conversion tables
Recipe 2 – Shea Butter
Ingredients :
- 450 g. opaque melt and pour soap base
- 1 tbsp. jojoba oil
- 1 tsp. shea butter
- 1 tsp. grated beeswax
- 1 tbsp. your favourite fragrance oil (or ½ to 1 tsp. your favourite essential oil)
In a heavy saucepan, melt the soap over low heat until liquefied.
Remove from heat and add the beeswax and shea butter until mixed.
Stir very well (gently, as always)
Allow to cool slightly. Add essential oil and the fragrance oil.
Pour (or spoon) the mixture into your moulds and let set for 3 hours or until hardened.
Click here for measurement conversion tables
Recipe 3 - Pomegranate
Ingredients :
- 175 g. white melt and pour soap base
- 90 ml. fat free milk
- 1 tbsp. almond essential oil
- 1 tbsp. aloe vera gel
- 1 tsp. pomegranate fragrance oil
- Red food colouring
In a heavy saucepan, melt the soap (grated) over low heat until liquefied.
Add the food colouring until the colour mimics a pinky/red pomegranate.
Warm the milk, almond oil, aloe vera and fragrance oil in a double boiler and stir until liquefied and well mixed.
Stir very well (gently, as always)
Add the soap mix to the milk mix and stir very well.
Remove from heat and allow to cool slightly.
Pour (or spoon) the mixture into your moulds and let set for 3 hours or until hardened.
Click here for measurement conversion tables
Recipe 4 – Vanilla and Almond
Ingredients :
- ½ cup whole almonds
- 120 g. castile soap
- 60 ml. distilled water
- 1 tbs. almond essential oil
- ¼ tsp. vanilla fragrance oil
Crush and then grind the almonds into a fine powder – the coarseness of the ground almonds will determine the texture of your soap. It also acts as a natural abrasive which helps to break down hardened dirt from your skin.
(Use a blender / coffee grinder to reduce the almonds to your preferred texture)
Shred / grate the castile soap.
In a heavy saucepan, melt the soap and water over low heat until liquefied.
Remove from heat and allow to cool slightly.
Add the almond powder, almond oil and vanilla fragrance oil and stir until well mixed.
Pour (or spoon) the mixture into your moulds and let set for 3 hours or until hardened.
Click here for measurement conversion tables
Natural Advantage Soap Recipes - Back to CATEGORIES
Loaf soaps
Recipe 1 – Fruitcake
Ingredients :
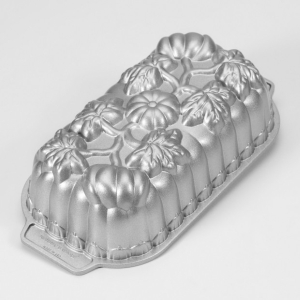
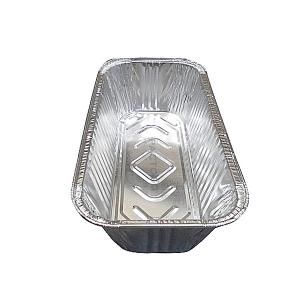
- 1 loaf pan (size depends on the size of the soap loaf you require - also, experiment with different designs)
 |
 |
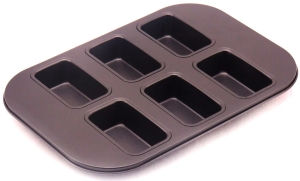
- 8 rectangular mini soap moulds (each mould should be 150 to 200 ml. - big enough for about 120g. of melted soap)
- 1150 g. unscented clear glycerine soap
- ¼ tsp. cherry + pineapple + lime + vanilla + cinnamon fragrance oils
- 1 ½ tsp. gingerbread fragrance oil
- Red, yellow, green, brown liquid food colouring
If this is your first time, check your mould sizes by estimating quantities using water. Use 1 g. = 1 mil. as a rough guide.
Step 1
Melt 120g. of soap in a small saucepan over low heat.
Once liquefied, add ¼ tsp. cherry fragrance oil and 5 drops of red food colouring.
Pour half of this mix into a cell of the rectangular soap mould, the other half into another cell.
Repeat this process as follows :
pineapple fragrance oil and yellow food colouring
lime fragrance oil and the green food colouring
brown food colouring
When all 8 bars are completely set, remove them from the moulds. Cut each bar into approximately 24 small pieces.
Put all the pieces into a bowl and mix the colours well and then freeze for a few hours.
Step 2
Melt 675 g. of soap in a small saucepan over low heat.
Add 1 ½ tsp. gingerbread + ¼ tsp. vanilla + ¼ tsp. cinnamon fragrance oil.
Add brown food colouring - try to match the colour of the brown cubes that you made in Step 1.
Once all mixed into a consistent colour, pour a very shallow layer into the loaf pan.
Then add a single layer of fruit chunks.
Pour more of the gingerbread soap to cover and add another layer of fruit chunks and cover with another layer of gingerbread. Repeat the process until all the soap pieces have been used up and the pan is full.
Step 3
Allow the loaf to set at room temperature and then put into the freezer for a few hours.
Remove frozen loaf from pan, thaw completely and dry any condensation with a paper towel.
Using a very sharp knife, cut the loaf into slices and wrap or decorate as you wish.
Alternatively, you can leave the whole loaf as one piece and decorate as is.
Click here for measurement conversion tables
Natural Advantage Soap Recipes - Back to CATEGORIES
Herbal Soaps
Recipe 1 – Mixed Herbs
Ingredients :
- 115 g. castile soap
- 2 tsp. dried rose petals
- 1 tsp. dried chamomile
- 1 tsp. dried peppermint leaves
- 1 tsp. dried orange blossoms
- 1 tsp. dried lemon grass
- 1 tbs. sesame oil
- 1 paper coffee filter / submersible tea strainer
- 60 ml. distilled water
Shred the castile soap by hand or blender and place on side.
Combine all the dried ingredients and insert them into the filter / strainer. (close and attach the filter with some string)
Boil the water in a small saucepan.
Remove the pan from the heat and add the bundled herb combination.
Let the water and herbs steep for about an hour.
Remove the herb bundle (using the string) and return the pan to the heat and bring it to the boil.
Stir gently and add the shredded soap until liquefied.
Remove from heat and add sesame oil (while stirring) after a few minutes.
Pour (or spoon) the mixture into your moulds and let set for 3 hours or until hardened.
Click here for measurement conversion tables
Recipe 2 – Glycerine
Ingredients :
- 450 g. unscented and clear glycerine soap
- 1 tbsp. your favourite fragrance oil (or ½ to 1 tsp. your favourite essential oil)
- 1 tbsp. your favourite herbal powder (such as chamomile, peppermint, vanilla, etc)
Melt the glycerine in the microwave until completely dissolved – avoid boiling the mixture (avoid full power)
Once liquefied, add the powder and oil.
Stir very gently to avoid trapping air bubbles in the mixture.
Pour (or spoon) the mixture into your moulds and let set for 3 hours or until hardened.
Click here for measurement conversion tables
Natural Advantage Soap Recipes - Back to CATEGORIES
Soft Exfoliating Soaps
Recipe 1 – Sesame Seed
Ingredients :
- 450g. coconut or palm soap base
- 120 ml. full fat milk (change to no fat milk if it is too greasy for you)
- 1 tbs. sesame seeds
- 2 tsp. sesame seed oil
In a heavy saucepan, melt the soap over low heat until liquefied.
Remove from heat and add the seed oil and milk.
Stir very well (gently, as always)
Allow to cool while stirring. Once the mixture starts to thicken, add the sesame seeds.
The thickened mixture will help to keep the seeds uniformly distributed.
Pour (or spoon) the mixture into your moulds and let set for 3 hours or until hardened.
Click here for measurement conversion tables
Natural Advantage Soap Recipes - Back to CATEGORIES
Gentle Everyday Soaps
Recipe 1 – Jasmine and Rice Bran
Ingredients :
- 115 g. castile soap
- 75 ml. soy milk
- 55 g. rice bran
- 5 drops jasmine fragrance oil
Shred the soap and set aside by hand or blender.
In a heavy saucepan over low heat, warm the soy milk and slowly add the shredded castile soap until the mixture becomes a sticky mass.
Remove the pan from the heat and add the rice bran and jasmine oil, stirring until the bran is evenly distributed.
The thickened and sticky consistency should provide a relatively uniform distribution of the bran particles.
Use a spoon to add the soap into your moulds and let set for 3 hours or until hardened.
Click here for measurement conversion tables
Natural Advantage Soap Recipes - Back to CATEGORIES
Simplicity makes it fun
These natural advantage soap recipes are simple to make and easy to use. Most ingredients are available from local health shops. Occasionally, you may have to buy some ingredients on the internet.
If the ingredients are not available in your country, always check your local laws to make sure that you can import cosmetics into your country - some countries restrict the import of cosmetic ingredients.
These natural advantage soap recipes are probably just the tip of the iceberg. There are probably many more favourites out there.
If you have one that you love and would like to share, we would all be very grateful and so would our community.
You can send one (or some) to us by using the form below.
Do You Know the Best Natural Advantage Soap Recipe?
One that feels great to use, easy to make and is kind to sensitive skins.
If you have something great and you want to share it then this is the place to do just that.
Here's how to do it ...
Natural Advantage Soap Recipes (Back to Top)
